.png)

Nowadays
the problem of bloggers after buying domain is to set the domain to the DNS
server. Last week when i bought domain for my entertainment blog www.naijabomnet.com i find it difficult to set my
blogger blog to 1 and 1.com DNS. So I started searching here and there,
searching the solution on Google. So after appropriate research I saw the
solution so I intend to share to others too.
So
below are the steps to connect or setup your DNS setting to your domain Cpanel.
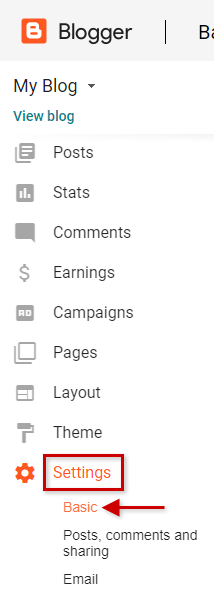
Step2:
in the left side menu click setting and then you will automatically land
in the Basic sections.
Step3:
scroll down to the Publishing section and select setup 3rd party for
your blog.

Step4:
enter your domain and click Save. As used in the picture below.
www.naijabomnet.com.

Step5:
a message will display showing error that your blogger has not connected or
unable to verify with authority of any domain and two CNAMEs will be displayed.

Step1:
click Domain in the left side menu.
Step2:
next to the domain you want to connect to your blogger site, click Actions
icon and select Manage subdomains.

Step3:
in the create subdomain box on the right side of the screen, Add subdomain.

Step4: In the Create Subdomain box on the right side of the screen, click Add subdomain.

Step5: Create a subdomain based on the first Name, Label, or Host field from
Blogger. In the example above, it is www, so the subdomain is www.naijabomnet.com

Step6:
create a second subdomain based on the second , Label, or Host field
from blogger. In the example above, it is g03fbxe2qka8 so the subdomain is
g03fbxe2qka8.naijabomnet.com

Setting
the CNAME Records
Step1:
next
to your www subdomain, click the Actions icon and select DNS
Setting.

Step2:
scroll down to the A/AAAA and CNAME Records sections and select CNAME.
Enter ghs.google.com in the Alias field and click the checkbox below. Then click save at the bottom of the page

Step3:
click Yes to confirm the changes.

Step4:
Repeat this process for the second
subdomain you created (g03fbxe2qka8.1and1help.com in our example) and enter the
information from the second Destination, Target or Points
To field in the Alias field.
The second CNAME record will always be unique. In our example above it is gv-wdndvx9shm8xm1.dv.googlehosted.com
The second CNAME record will always be unique. In our example above it is gv-wdndvx9shm8xm1.dv.googlehosted.com

Setting the IP Address.
If you’re using a www subdomain for yyour
blogger site, you will also need to set an IP Address to point your root domain
(such as naijabomnet.com ) to Google’s servers.
Please
note:
If you are using a different, custom subdomain, such as blog.yourdomain.com, you can skip the following steps,
return to Blogger, and click Save to connect
your subdomain.
Step1: after saving your second CNAME record, you will be
returned to the subdomains tab for your domain. On the righhand side,
click DNS Settings.

Step2:
Scroll down to the A/AAAA Records panel and select Other IP Address. Then, enter 216.239.32.21 in the IPv4 Address field and click Save.
Scroll down to the A/AAAA Records panel and select Other IP Address. Then, enter 216.239.32.21 in the IPv4 Address field and click Save.

Step3: click Yes to
confirm the changes.

Step4:
You can now return to blogger and click Save
to connect the subdomain.


Step5: Recommended: After connecting your www subdomain,
you should enable the option Redirect yourdomain.com to
www.yourdomain.com and once again click Save.
This will allow visitors to access your blog by going directly to your domain (i.e. yourdomain.com) instead of specifically www.yourdomain.com.
This will allow visitors to access your blog by going directly to your domain (i.e. yourdomain.com) instead of specifically www.yourdomain.com.
I hope this article is being helpful, click the
sharing buttons to share with others that doesn’t know. If you have any
question feel free to ask and also comment let me see your idea on how you
setup your domain for your website.


No comments:
Post a Comment